Firebase Assistance - Android Studio FIREBASE
- Firebase Tutorial
- Features of Firebase
- Android Studio
- Firebase - Environment Setup (with android studio)
- Firebase Assistance - Android Studio
- Firebase Authentication
- Firebase: Google Sign-In Authentication
- Firebase: Facebook Sign-In Authentication
- Firebase: Sign-In Authentication Using Phone Number
- Firebase UI: Authentication using email/password
- Firebase UI: Authentication using email link
- Firebase SDK: Authentication using email/password
- Firebase SDK: Authentication using the email link
- Firebase: Realtime Database
- Firebase: Real-time database setup and configuration
- Firebase: Data Organization in Real-time Database
- Firebase: Realtime Database Reading and Writing
- Firebase: Realtime Database Update and Delete
Firebase Assistance - Android Studio
Firebase Assistance - Android Studio
Firebase Assistance automatically adds the necessary Firebase files and code to our Android project.
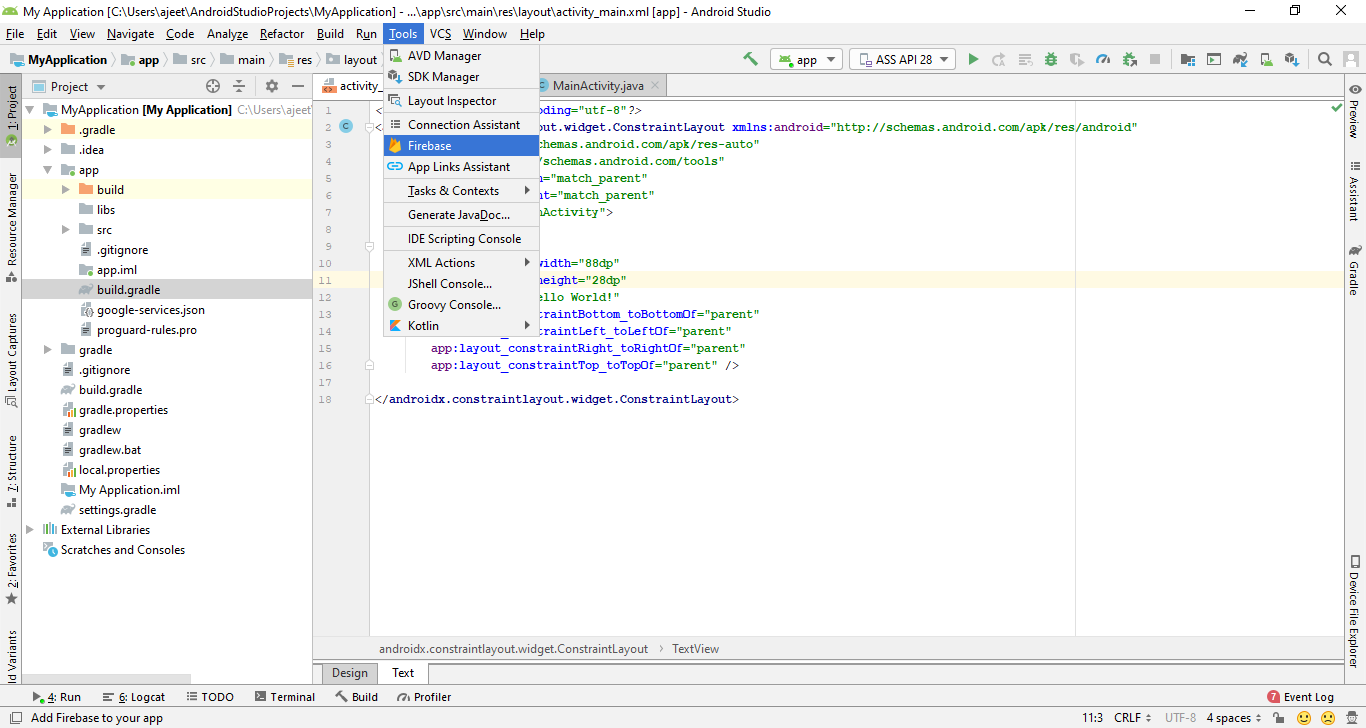
We can simply add Firebase using Firebase Assistance by selecting Firebase from the tools menu in Android Studio.

When we click on Firebase, a new window will open that contains several Firebase features such as Analytics, Cloud Messaging, Authentication, and Real-time Database, etc.

Let's start with basics, i.e., Analytics. When we select Analytics, it gives us the step by step guide of what we need to do.

Step 1:
So, in the first step, we will connect to Firebase. When we click on connect to Firebase, it may bring up our browser, and we may have to log into our Google account. If we log in to our Google account, we may have to give access to Android Studio so that it can allow us to add stuff.

When we click on allow, it will take us back to Android Studio. Because our project is already connected with Firebase, it will pop up a message, i.e., Firebase already connected. But if our project is not connected with Firebase, it will show the following window.

Here, we have to create a new Firebase project or choosing the existing Firebase project. It completely depends on us. When we click on Connect to Firebase, our project will connect with Firebase successfully.

Step 2:
In the next step, we will add analytics to our app by clicking on Add Analytics to your app. This will actually update our build.gradle files, which we did in the previous section.

When we click on Accept Changes, it will update our Gradle files, which we can verify by going to build. Gradle files.


